2019-04-26 | Alina Nachtmann | 3 min read
Frontend Development on Fitbit
As my colleague Max reported a few days ago in his blogpost, we recently developed and released our first Fitbit app. The app is an extension for the Home Connect ecosystem of BSH, with which you can control your home appliances in your Smart Home with the help of a Smartwatch.
Especially the frontend of such a Fitbit application has some special features, which I would like to point out in this blogpost.
Design on 348x250 pixels
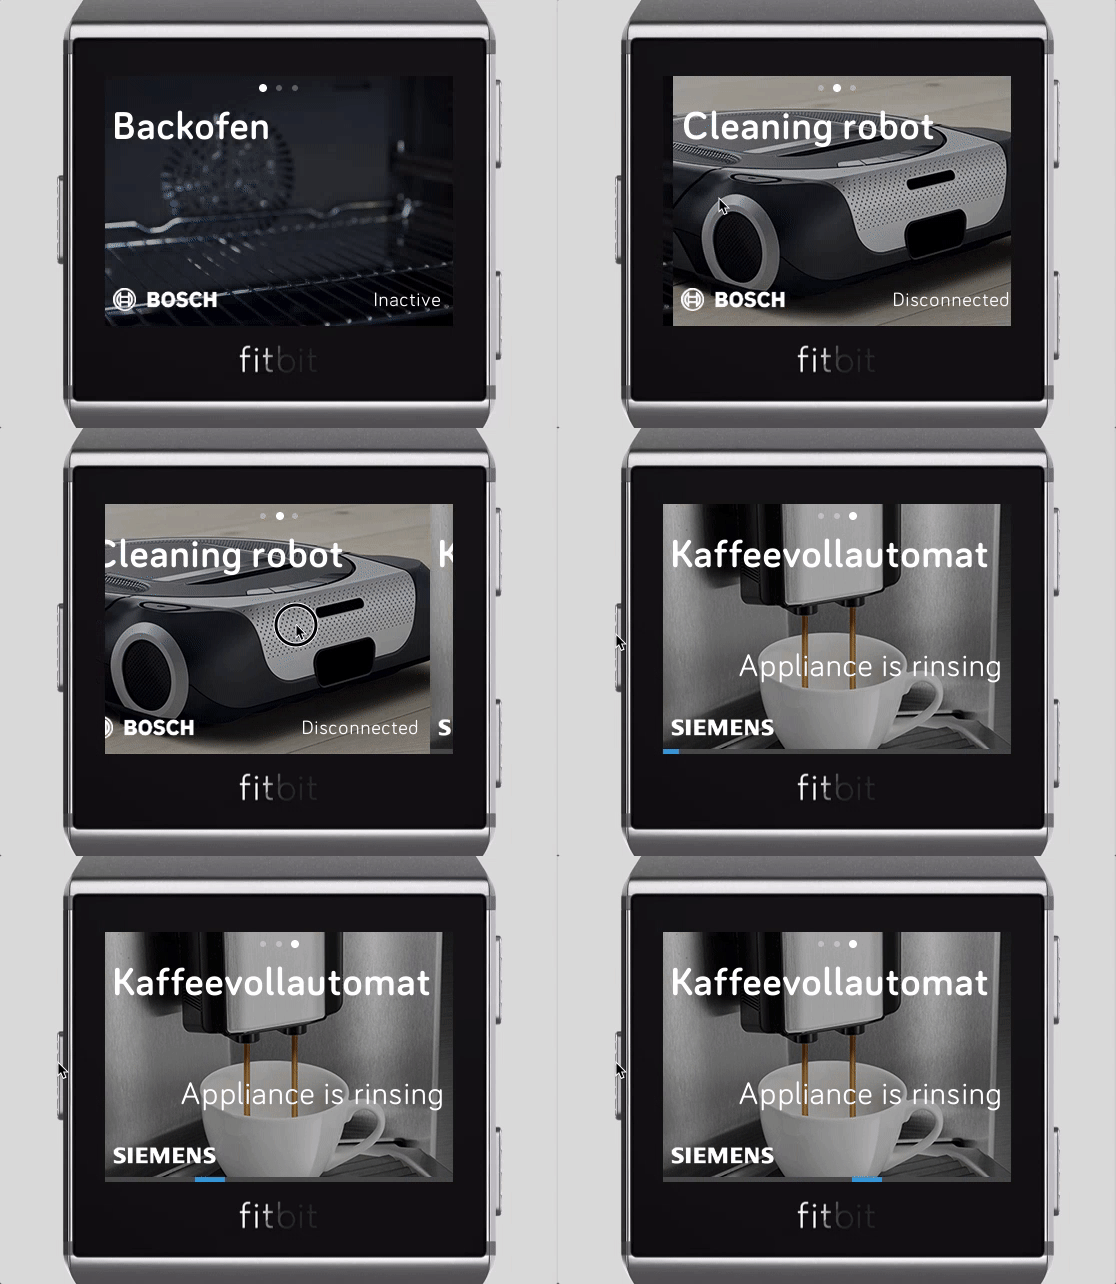
It seems quite trivial at first, but due to the low resolution of 348x250 pixels for the Fitbit Ionic, respectively 300x300px for the Fitbit Versa (Lite), compared to a big screen you have to rethink a bit. So in our example you don’t have a menu or a list for the selection of your home appliances, but you simply swipe to the right or left. This doesn’t seem very intuitive at first glance, but Fitbit has already thought about it and provides various components that are explained in this guide.
Components
One of these components is the Panorama View described above, which allows the user to swipe from right to left. In addition, pagination points are automatically displayed, which tell the user how many pages he can scroll through and which page he is currently on.

There are other such predefined view components, such as the Scroll View, where the view is taller than the actual screen and the user can scroll further down. Or a Tile List, which allows scrolling vertically through a list of items.
But not only for such views there are widgets - also for smaller parts of a Fitbit UI. Examples are Buttons or Text Components in different layouts and variations.
SVG and interaction with Javascript
If you have clicked on one of the links in the upper paragraph, you will notice that the code examples are all embedded in an <svg> tag. And indeed - while SVG from other application areas is better known from single icons and animations, Fitbit describes the complete UI in SVG .gui files. So it’s worth getting familiar with SVG and its basic principles before developing a Fitbit UI.
Fortunately, you don’t just have to live with hard-coded SVG elements. With the help of the app logic written in Javascript (or in our case Typescript), you can interact with the UI, more precisely with the HTML DOM objects. A simple example:
<svg>
  <text id="dino">All dinosaurs clap in time!</text>
</svg>
With Javascript we simply change the text:
let dino = document.getElementById("dino");
dino.text = "But dinosaurs have arms too short!";
So you can react to user interactions at runtime and adjust the UI accordingly. But unfortunately this has its pitfalls…
Dynamic generation of content
…namely the dynamic generation of content. Existing SVG elements can be changed, but no new ones can be added. In our example with the home appliances this was a real problem, because we display a variable number of home appliances - depending on how many the user has paired. Our workaround for this was to create a maximum number of home appliances as SVG elements, hide them by default and then enable them for each paired appliance using Javascript.
However, there is already a Fitbit component that generates elements and it’s called Virtual Tile List. Unfortunately, this only helps in a relatively special case.
We hope that Fitbit will continue to evolve in the future - at the moment you still have the feeling that you can only use a small part of the actual SVG and Javascript possibilities. Nevertheless, the development was a lot of fun - and who wouldn’t want to James Bond-like tell his watch to brew a coffee?!
Scandiolife on Instagram.
Connect with us on LinkedIn.
Look what Scandio is tweeting.


